Rache.co.uk and TK2441.co.uk
  • Home
  • Ghostbuster
    • Belt circuit build
    • Proton pack build
  • Sandtrooper
    • Armour weathering
    • T-21 blaster build
    • Field pack build
    • Armour photos
    • Event photos

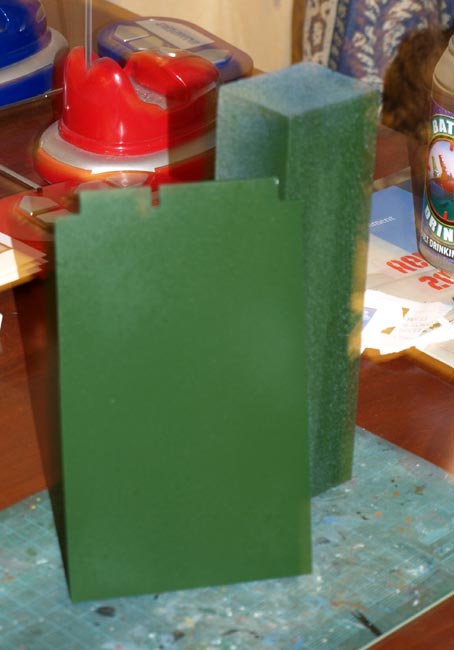
"DR SMITH" - GHOSTBUSTER PROJECT 2008 - BELT CIRCUIT GIZMO BUILD

PLEASE DO NOT email me asking me to build one of these for you - I run my own business and simply do not have the spare time. I also didn't particularly enjoy building this one as I'm certainly no prop-maker - I'd not want to do it again. I'll happily give advie on the build and where to get stuff from though.

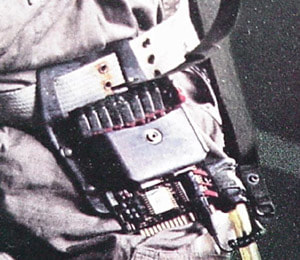
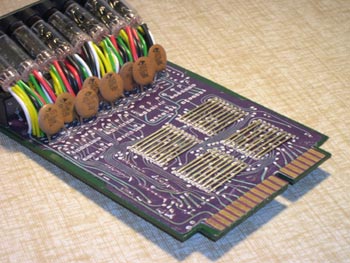
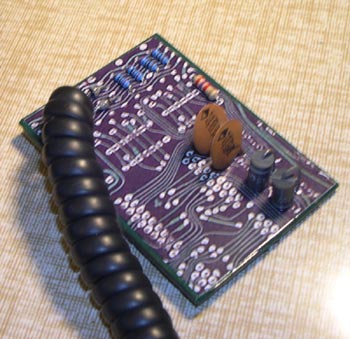
For the belt circuit prop that the GBs wear on their belts, you need to replicate a 1980s SANYO ICC 808D or a Minolta Minolcom calculator circuit board. These things are rarer than rocking horse shit now, and go for $$$$ when they appear on eBay (which is rarely).
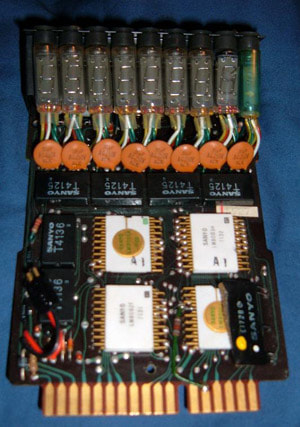
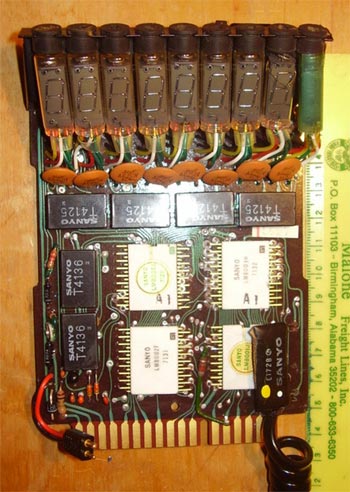
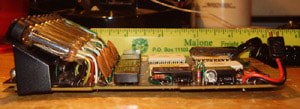
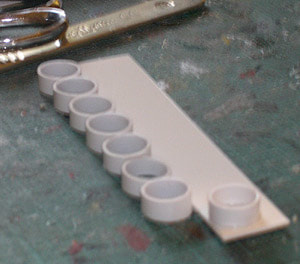
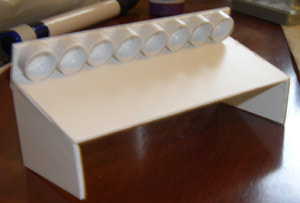
Here are all the dimensions - use these to draw a paper template on graph paper, then use that template to cut out a base board on some stiff plastic:
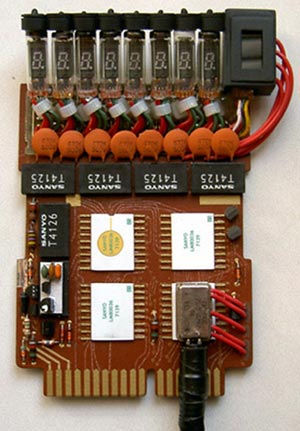
  • Max width of the board is 95.5mm
  • Max height of the board is 147.6mm
  • Overall width of the edge connector is 72.6mm centered on board
  • Left edge connector is 44.9mm
  • Right edge connector is 24.7mm
  • Height of edge connector is 9.8mm
  • Side indents are 2.3mm deep
  • Side indents start about 49.3mm from the bottom (not including the edge connector) and are about 40.9mm tall
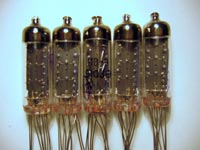
  • The exposed glass part of the gas-discharge displays is about 25.7mm tall and 10mm wide
  • The white chips are 23mm tall by 16.5mm wide (excluding legs) Metal window cover ones are about 1m thick while the non windowed ones are 2mm They are elevated off the board give or take 3mm
  • The black ICs are 20mm wide by 12mm in length and 3.9mm tall, they are elevated off the board give or take 1mm
  • The pillow shaped IC in the bottom right is 30.6mm by 12.5 and 3.5mm thick.
Use the blank circuit template image below and glue then lacquer it onto the base board.  If you need me to email you a JPG of the blank circuit then email me,
Here is a screen shot of a movie belt gizmo
Here is the original Sanyo circuit board
Sanyo circuit board with measurement
Reference shot
Reference shot
You will need 14mm capacitors, I got these from eBay seller ellyexcess
Here are the correct size Nixie tubes from eBay seller Nixiestore. You want the IV-9 Numitron tubes
Here are the Nixie tubes with the correct colour wires - you have to buy the wire, strip off the plastic cover, and slot it over the Nixie wires. There are 2 black, 2 yellow, 1 green 1 white and 1 red, on each Nixie
This is the underside of the circuit board, flip this over in Photoshop so it's a mirror image, to get it the right way round, resize the width to be 95mm then print it out on photo paper using max dpi.
Sprayed base board.
Use the solder points on the photo of the circuit as drilling guides for the Nixie wires - we had to drill 4 holes higher up though as the Nixie wires wouldn't reach otherwise! Also use the photo solder points as guides for the capacitors.
For the black caps that run along the top of the Nixies, use flat styrene and styrene tubing, available from model shops
Make this sloping shelf, also the width of the circuit board
Then glue them together, prime, and spray black. This will then glue onto the top of the circuit board - the Nixies slot into the circles, and glue them to the sloping base.
Using brass round wire about 1mm, holes were drilled in the board and the wire bent into an elongated staple shape, and pushed theu the holes then Araldited on the rear.
Then print out a scan of the white chips, glue to white styrene, then Araldite on top of the brass wire.
Black chips were mocked up in Photoshop then printed on photo-paper and glued onto 3mm perspex. Random resistors and capacitors also glued on. All done now!
Smaller part of belt circuit - awaiting a couple of old Chips then all done!!!
Powered by Create your own unique website with customizable templates.
  • Home
  • Ghostbuster
    • Belt circuit build
    • Proton pack build
  • Sandtrooper
    • Armour weathering
    • T-21 blaster build
    • Field pack build
    • Armour photos
    • Event photos